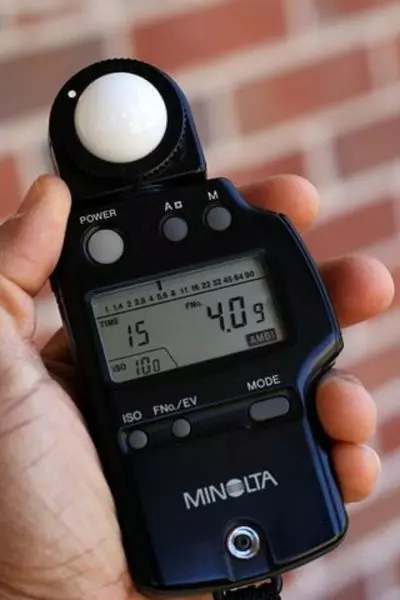
4 Reasons Light Meters Still Rule in Digital Filmmaking

In the celluloid era, light meters were essential to ensure proper exposure of the film negative. In today’s digital world, where you can immediately see your images on a monitor, it may seem like light meters are obsolete.
But these devices still have their place in modern cinematography. On a bigger production, when you may not be at the camera the whole time, they can be very useful. Interrupting your ACs (as they set up the sticks, swing the lens, put on the eyepiece extension, balance the fluid head, run cables to the monitors, etc.) in order to see if your image is correctly exposed on camera can be inefficient.
And having the reliable, hard number a light meter gives you can be more reassuring than judging false colours or histograms.
Here are four ways in which I used my brand new light meter on my last production, The Little Mermaid:
- To call ND filters. When shooting outdoors, I would take light readings in the sun and in the shade, and when then the sun was in, to understand the range of light levels I was dealing with. I could then pick an ND filter that would put me at a stop at where I would still have the room to adjust the iris a little either way if the light got brighter or darker. This was particularly important when we were shooting on water in a splash bag, when changing NDs or even just adjusting the iris was a longer process. (In my next post I’ll look deeper into stop maths and ND filters to demonstrate exactly how to select an ND filter based on a light reading.)
- To measure contrast ratios. The Alexa can handle up to seven stops of over-exposure and eight stops of under-exposure. Knowing this, I could use my meter to see if certain areas were going to blow out or crush, before the camera was even set up. I could also measure how many stops the key side of an actor’s face was above the fill side, and thus work out the key-to-fill ratio. At present this is still something I judge by eye on the monitor, but the more I get to know the numbers, the more I suspect I will start determining it in advance.
- To check green-screens are properly lit. The visual effects supervisor, Jafar, told me that green-screens should be exposed at key, or up to half a stop over key. So if I was shooting at T4, I would walk along the green-screen and take readings at various points to make sure the meter was generally giving me between f4 and f4½.
- To schedule a dusk shot. For a twilight scene on a beach, I needed to know in advance exactly what our window of opportunity was. Looking up the sunset time is all well and good, but it doesn’t help you figure out how long afterwards there will be enough ambient light left to shoot with. So while at location the day before, I went out onto the beach and took light readings every few minutes after sundown. These told me I had 20 minutes from sunset until the ambient light dropped below what the lenses could expose.
Do you use a light meter? And if so, how?
Learn how to use Light Meters practically with my Cinematic Lighting online couses.
Jump To Section

Earn As You Learn
Earn 25% commission when your network purchase Uplyrn courses or subscribe to our annual membership. It’s the best thing ever. Next to learning,
of course.


Leave your thoughts here...
All Comments
Reply