How to Draw a Character from Your Imagination in 2026
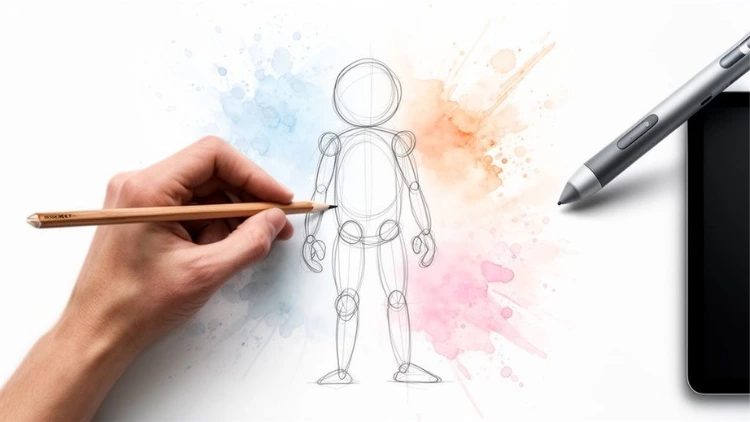
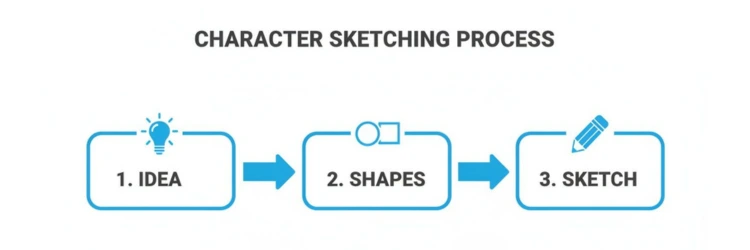
Learning to draw a character is about translating a feeling into a visual. It starts with big, simple shapes and capturing energy long before you worry about details. The whole process is about finding an idea, making a quick gesture sketch, and building a foundation with basic forms.
Jump To Section

Earn As You Learn
Earn 25% commission when your network purchase Uplyrn courses or subscribe to our annual membership. It’s the best thing ever. Next to learning,
of course.
From Blank Page to First Sketch
We’ve all been there—staring at a blank page, feeling the pressure to make something perfect. The secret? Let go. Every amazing character started as a messy idea. Forget anatomy charts for a moment; your only goal is to get something on the page that captures the vibe of your character.
Before you draw a single line, you need a spark. Inspiration is everywhere. It could be the determined posture of a barista during the morning rush or the way a hero stands in your favorite movie. Don't just see it; observe it. Notice the soft C-curve of someone slouching over their phone or the sharp, aggressive angles in an athlete's pose. This is your raw material.
Capture Energy with a Gesture Sketch
The very first drawing you should make is a gesture sketch. This isn’t about anatomy or getting things "right". It’s purely about energy and movement. It's a lightning-fast, loose drawing—often taking less than 30 seconds—that becomes the emotional blueprint for your final piece.
- Practical Example: To draw an energetic, leaping character, use your whole arm to draw a single, sweeping S-curve across the page. For a sad, defeated character, a slumped C-curve instantly communicates that feeling. Don't lift your pencil; let the line flow.
- Actionable Insight: Your initial sketch should prioritize flow over accuracy. Think of it as capturing the character's 'vibe' in one or two dynamic lines. It's the foundation of a lively drawing, not a stiff figure.
Build Your Figure from Simple Shapes
With your gesture line in place, you can start blocking in the figure using basic shapes. This is how you give your idea its first hint of structure without getting lost in the weeds.
- Circles and Ovals: Perfect for heads, joints, and softer body types.
- Actionable Insight: Try drawing a few overlapping ovals to form a torso and hips for a friendly, approachable character.
- Squares and Rectangles: Excellent for creating stability and strength.
- Practical Example: Use a large, blocky rectangle for the chest of a powerful warrior to make them look solid and unmovable.
- Triangles: Fantastic for adding dynamism and suggesting direction.
- Practical Example: An inverted triangle for the torso (broad shoulders, narrow waist) instantly reads as heroic.
A heroic character, for example, might be constructed from a strong triangular torso and a rectangular block for the hips. A friendly, gentle character might be built almost entirely from soft circles and ovals.
Building Your Character's Foundation with Shapes
You’ve captured the energy of your character with a gesture drawing. Now, we need to give it substance. This is where we turn that spark into a solid, three-dimensional figure.
We do this by building a kind of "mannequin" using simple, geometric shapes. Think of it like an artist's wooden dummy, but one you draw right on the page. This step is all about adding believable form and volume, ensuring your character feels grounded instead of flat. It's the bridge from a rough idea to a structured sketch.
This method takes the guesswork out of proportions and anatomy. Instead of just hoping the limbs look right, you're constructing them with purpose.
Constructing the Torso and Limbs
Always start with the torso—it’s the anchor for the entire body. Begin with a simple oval or a slightly boxy shape for the rib cage, then add another for the pelvis. The angle and distance between these two shapes immediately define the character's core posture. If you push them together, the character crunches forward; pull them apart, and they stretch back.
Once the torso is set, it’s time to attach the limbs. Use single lines to map out the bones in the arms and legs, then place small circles where the joints go: shoulders, elbows, hips, and knees. This gives you a simple but fully articulated skeleton to work with.
- Actionable Insight: A simple trick to always use is drawing a centerline down the torso. This helps you track how the body is turning and keeps everything from the neck to a belt buckle properly aligned.
Remember, the point isn't to draw a medically accurate skeleton. It’s to build a simplified mannequin you can easily pose. This is a trick pros use all the time to test poses and nail down proportions before getting lost in the details.
Using Shape Language to Define Personality
Here’s where it gets really interesting. The specific shapes you choose are a massive part of visual storytelling. You're actually embedding personality into your character's anatomy.
- Rectangles and Squares: Got a tough, unshakeable character? Build them from squares. These rigid, stable shapes scream strength and power.
- Practical Example: Think of a stoic knight with a boxy chest and thick, rectangular arms.
- Circles and Ovals: Soft shapes feel friendly, gentle, or graceful.
- Practical Example: A bubbly, approachable sidekick or an elegant dancer is often built from a series of smooth, overlapping circles and ovals.
- Triangles: Triangles are all about energy and dynamism. They create a feeling of action or danger.
- Practical Example: The classic heroic figure often has an inverted triangle for a torso—wide shoulders tapering to a narrow waist—to signal both strength and agility.
To help you get a better handle on these techniques, here’s a quick breakdown of how these fundamental skills serve your character art.
Using these skills together is what brings a character to life on the page.
Choosing your shapes consciously is a game-changer. It’s a practical way to make your designs more effective. To go even further, you can explore the elements of art and principles of design in this dedicated guide. Understanding this stuff isn't just theory—it's what separates a good drawing from a great one.

Crafting a Face with Unforgettable Expression
The body gives a character form, but the face? That's where you give them a soul. A simple shift in an eyebrow or the turn of a mouth can tell a whole story, transforming a generic sketch into a living, breathing person.
This is where your character’s personality really shines through.
To pull this off consistently, you need a solid foundation. The go-to method is a simplified take on the Loomis method. You start with a sphere for the main part of the skull. Then, imagine slicing off the sides just a bit, like you're trimming an apple. From there, you add the jawline. You can make it angular for a character who feels more stern or traditionally masculine, or you can keep it soft and rounded for a more youthful or gentle vibe.
Placing the Features Accurately
Okay, you've got a head shape. Now for the part that trips up so many artists: getting the features in the right spot. A few simple guidelines are all you need to keep your character from looking "off".
- The Eye Line: Find the horizontal center of that sphere you drew. The eyes sit right on this line.
- Actionable Insight: Don't draw the eyes on the top half of the head; it's a common beginner mistake. Placing them on the center line feels counterintuitive but is anatomically correct.
- The Nose Line: Now, draw a line halfway between your eye line and the bottom of the chin. This is where the bottom of the nose will sit.
- The Mouth Line: One more! Find the halfway point between the nose line and the chin. That’s your mark for the mouth.
These guidelines are your best friend for maintaining correct facial proportions from any angle. Even after years of drawing, lightly sketch these lines on every face you create to keep things consistent.
As you get into the details, remember that every little thing matters. The eyes really are the windows to the soul. A wide-eyed look can scream surprise, while a subtle squint can signal anything from focus to deep suspicion.
It’s this human touch—the ability to craft genuine emotion—that’s becoming more valuable than ever. As technology advances, AI is projected to speed up animation production by as much as 30%. By 2026, it could even handle around 50% of routine tasks like animating subtle facial movements. This means an artist’s core skill of directing those emotions and creating powerful key expressions becomes the real moneymaker.
An Exercise in Emotion
Let's put this into practice. Grab a pencil and draw one neutral face using the guidelines we just covered.
Got it? Good. Now, copy that face three times. We're going to give it three totally different personalities.
- Joy: Arch the eyebrows up. Pull the corners of the mouth into a wide smile. Don't forget the "crow's feet" crinkles at the corners of the eyes—it makes the smile feel genuine.
- Suspicion: Drop one eyebrow and raise the other slightly. Press the lips into a thin, straight line. Squint the eyes just a touch. See? Instant skepticism.
- Surprise: Raise both eyebrows high on the forehead. Open the eyes wide and part the lips into a classic 'O' shape.
This simple drill gives you a repeatable process for breathing life into any character. It shows you firsthand how a few small, intentional marks can completely change the story your character’s face is telling.

Designing Costumes and Props That Tell a Story
Alright, so you've got a character with a solid structure and a face that hints at their personality. Now for the fun part: dressing them up. What your character wears and carries isn't just window dressing—it’s a massive part of their story.
Every choice you make here broadcasts who they are.
- Practical Example: A character in a crisp, spotless jumpsuit tells a totally different story than one decked out in battered leather armor. The jumpsuit screams order, high-tech living, and maybe a bit of conformity. The armor? It tells us they've seen battle, they're a survivor, and their world isn't exactly safe.
Researching for Authenticity
To create costumes that feel real, you have to look beyond your own imagination. A common rookie mistake is to just guess. If you're drawing a historical knight, don't just wing the armor.
- Actionable Insight: A quick search for something specific like "14th-century leather gambeson" will give you a goldmine of details—the right kind of seams, buckles, and padding that make the design feel grounded and authentic.
This same idea works for any genre you can think of:
- Fantasy: Look at real-world historical clothing.
- Practical Example: A mage from a desert kingdom might wear loose, layered robes inspired by traditional Bedouin attire, which is both visually interesting and practical for the climate.
- Sci-Fi: Study modern-day functional gear.
- Practical Example: Look at pilot g-suits or deep-sea diving equipment. Pay close attention to where seams, straps, and connection points are placed. This is what makes a design look like it actually works.
This level of detail is more important than ever. The industry is showing a huge preference for illustrations with real human insight, moving away from the same old generic looks. You can actually read more about these illustration trends for 2026.
Drawing Fabric with Believable Folds
One of the biggest giveaways of an amateur artist is flat, lifeless clothing. Making fabric look real all comes down to understanding two things: tension points and gravity. Fabric will always pull tight over joints like elbows and knees, but it will hang loosely and bunch up everywhere else.
- Actionable Insight: Focus on just two or three major folds that describe the form underneath. Too many little wrinkles will just look messy. A simple "Z" or "S" shape fold where an arm bends is often more effective than drawing dozens of tiny lines.
- Practical Example: Let's say your character is wearing a heavy cloak. The fabric will hang in deep, almost tube-like folds straight down from their shoulders, maybe pooling on the ground. But if they suddenly raise an arm, you've created a new tension point. Now, you'll see a series of diagonal folds radiating out from that point. Thinking about these simple forces is the key.
Bringing Your Character to Life with Shading and Detail
A character sketch without shading is just an outline. It's the interplay of light and shadow that transforms a flat drawing into a three-dimensional form that feels like it has real weight and presence. This is where your character truly starts to pop off the page.
The entire process hinges on one simple decision: where is your light source? A light from above will cast different shadows than a light from the side. Once you decide, everything else falls into place.
The Fundamentals of Shading
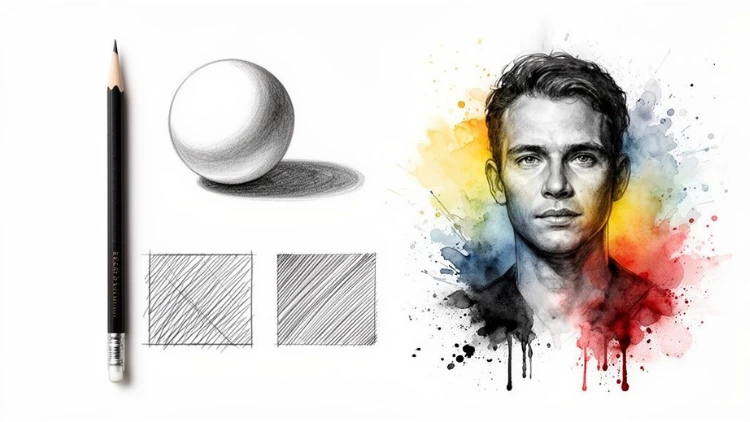
Imagine your character is made of simple shapes, like spheres and cylinders.
- Practical Example: First, let's practice on a sphere. Pick a spot for your light source. The side of the sphere facing it will be the highlight (brightest part). The side opposite will be in core shadow (darkest area). In between is the mid-tone.
Shading isn’t about making things dark; it’s about describing form. Every shadow you add should help define the shape of your character, telling the viewer if a surface is round, flat, or sharp.
Once you’re comfortable shading a simple sphere, you can apply the same logic to your character. The top of the head, the tip of the nose, and the front of the shoulders will catch the light, while the area under the chin, inside the ears, and beneath the hair will be in shadow.
Shading Techniques You Can Use Today
There are many ways to apply shadow. You don't need to master them all at once; just pick one and practice.
- Cross-Hatching: This is a classic technique where you draw parallel lines and then layer another set of lines over them at an angle. The closer the lines, the darker the shadow. It’s excellent for creating texture.
- Stippling: This involves creating shadows with tiny dots. It takes patience, but it allows for incredibly subtle and smooth gradients, making it a great choice for skin or soft surfaces.
- Smooth Shading (Pencil/Digital): With a pencil, you can use the side of the lead to lay down smooth graphite tones. Digitally, a soft airbrush can achieve a similar effect for creating gradual transitions.
If you are new to rendering form, exploring the essential techniques for portrait sketching can provide a great foundation for applying these methods to faces.
An Actionable Tip to Instantly Improve Your Art
One of the most effective ways to add depth is by varying your line weight. This means using different line thicknesses in your drawing. It’s a simple trick with a huge impact.
The rule is straightforward: use thicker lines for areas in shadow or for parts of the character that are closer to the viewer. Use thinner, more delicate lines for areas bathed in light or for fine details.
- Practical Example: The line defining the jaw that casts a shadow on the neck should be thicker than the line for the upper lip.
This technique not only helps with shading but also makes your final line art look more professional and dynamic. It guides the viewer's eye and adds a level of polish that flat, uniform lines just can't match.
Your Next Steps in Character Design
So, you’ve drawn your first character from start to finish. That’s a huge step. But the real growth doesn’t happen in that one drawing; it happens in what you do next. This is where you shift from just following a guide to building real, intuitive skill.
Don't fall into the trap of thinking you need to create a masterpiece every time. The best way to improve is through quick, targeted exercises that build your muscle memory and train your eye.
Actionable Drills to Build Your Skills
A fantastic drill is the 30-second gesture drawing. Just pull up some reference photos, set a timer, and try to capture the core energy of a pose in just half a minute. This forces you to see movement and flow instead of getting bogged down in details.
Another great exercise is to give yourself a simple character prompt each week. Practical Example: Think of something like "a grumpy wizard who lost his hat" or "a cheerful robot delivering flowers". It pushes you to think about story and personality.
- Gesture Sessions: Try to squeeze in 10-15 minutes of quick gesture drawings every day. It's the best way to develop a feel for natural anatomy and fluid poses.
- Character Prompts: Use those weekly prompts to stretch your creative muscles and get comfortable designing for a purpose.
- Study the Masters: Go look at the artists you admire. But don't just stare at their finished, polished work. Hunt down their rough sketches and concept art to see how they built their characters.
Once you feel confident drawing static figures, you can start thinking about bringing them to life. Dipping your toes into the world of character animation is a natural next step that can open up a whole new world of possibilities.
- Actionable Insight: The most impactful practice is often small and consistent. A little drawing every day builds more skill over time than one marathon session per month. It’s about making art a habit, not a chore.
And believe me, this kind of consistent effort can lead to some incredible career opportunities. The global animation market was valued at a staggering $462.32 billion in 2025 and is projected to hit $953.31 billion by 2035. That kind of explosive growth means there's a huge demand for skilled artists who can design compelling characters.
If you're starting to think about turning this passion into a career, this guide on how to become an artist is packed with real-world advice from professionals who have already walked that path.
Stuck on Something? Common Character Drawing Questions Answered
Every artist hits a snag now and then, especially when you're just starting out with character drawing. Let's tackle some of the most common questions and roadblocks that pop up on the journey.
How Long Does It Take to Get Good at This?
There’s no secret formula or magic number here. Your progress is tied directly to how often—and how smartly—you practice.
Most new artists who can carve out even 15-30 minutes for focused, daily practice start seeing serious improvement within 3 to 6 months.
- Actionable Insight: The real key is to focus on your fundamentals. Nailing down basic shapes and mastering gesture drawing will get you much further, much faster, than trying to crank out a perfectly finished masterpiece from day one.
What Are the Biggest Beginner Mistakes I Should Avoid?
Without a doubt, the single biggest mistake is jumping right into the cool details—like eyes and hair—without building a solid structure underneath. It’s a surefire way to end up with weird proportions and stiff, lifeless figures.
Keep an eye out for these other common traps:
- "Chicken Scratching": This is when you use short, hesitant, fuzzy lines.
- Actionable Insight: Try turning your paper and drawing with your whole arm to make longer, more confident strokes.
- Drawing Without Reference: Trying to pull everything from your imagination is incredibly difficult when you're still learning. Using references is how you teach your brain about proper anatomy and form.
- Skipping Construction: That initial "mannequin" phase of blocking out the body with simple shapes? It might seem tedious, but skipping it is the number one reason anatomy goes haywire.
As professional artist Kay Davault has pointed out, getting obsessed with finding a "perfect art style" is another huge hurdle for artists. Your unique style isn't something you find; it's something that evolves on its own as your fundamental skills grow. Just keep drawing.
Should I Start With Digital or Traditional Tools?
Always start with the basics: a simple pencil and some paper. It's the best way to build your core drawing skills—like line control and understanding form—without getting sidetracked by all the bells and whistles of digital software.
The great thing is, these foundational skills are 100% transferable. Once you feel comfortable with a pencil, making the jump to a drawing tablet will feel way more natural and less overwhelming. Plenty of pros work in both mediums, picking the tool that's right for the job.
Ready to push past the basics and really level up your character art? Explore our creative arts courses and start building your skills today.


Leave your thoughts here...
All Comments
Reply